This section describes how to manage connections with pre-exiting vaults.
To create a Vault Connection follow the steps below:
- To navigate to the Vault Management page, Click Vaults, then click Add Connection to create a new vault connection.
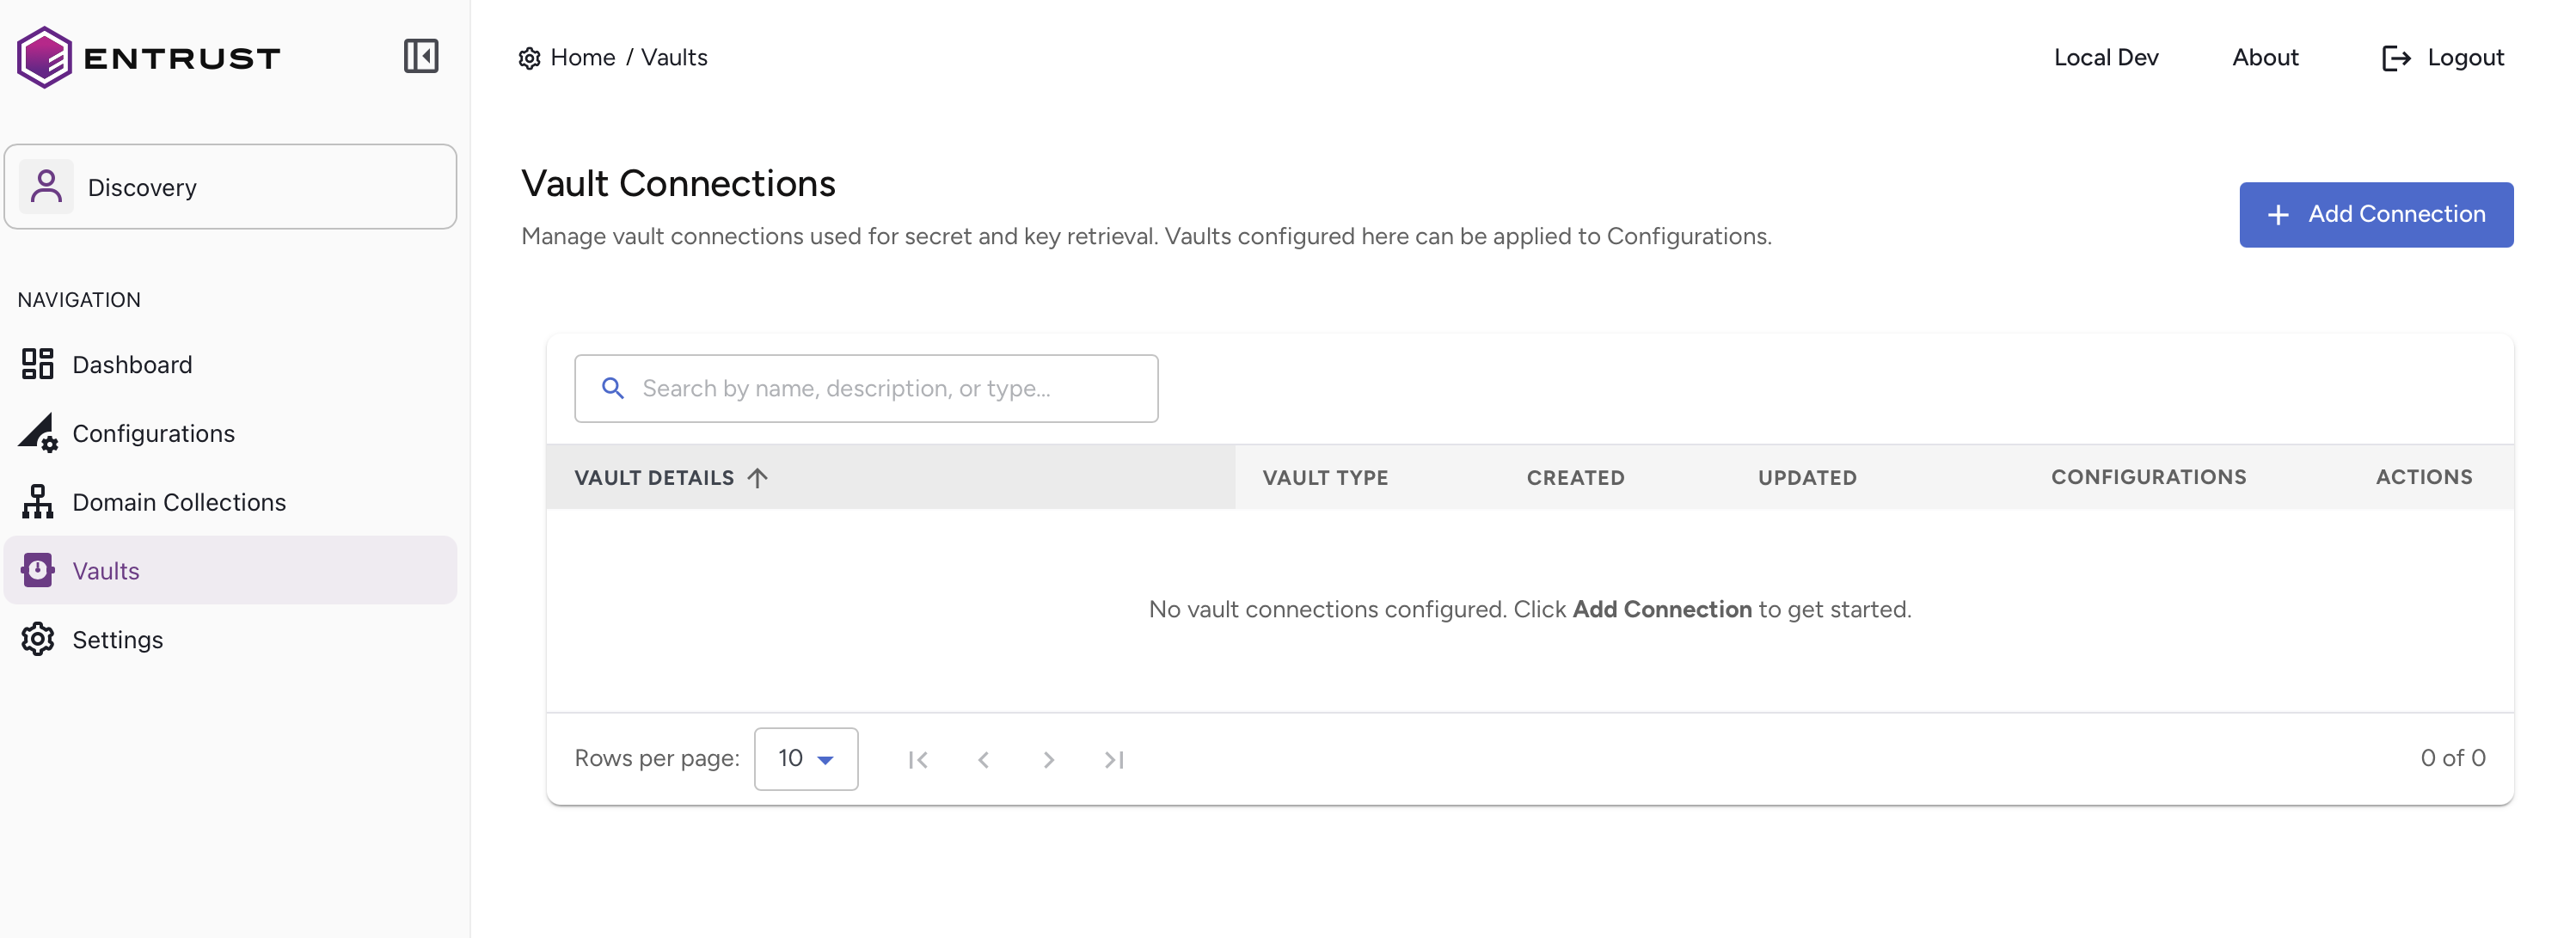
Note: Four supported Vault types are 1Password / Entrust KeyControl / CyberArk / HashiCorp.
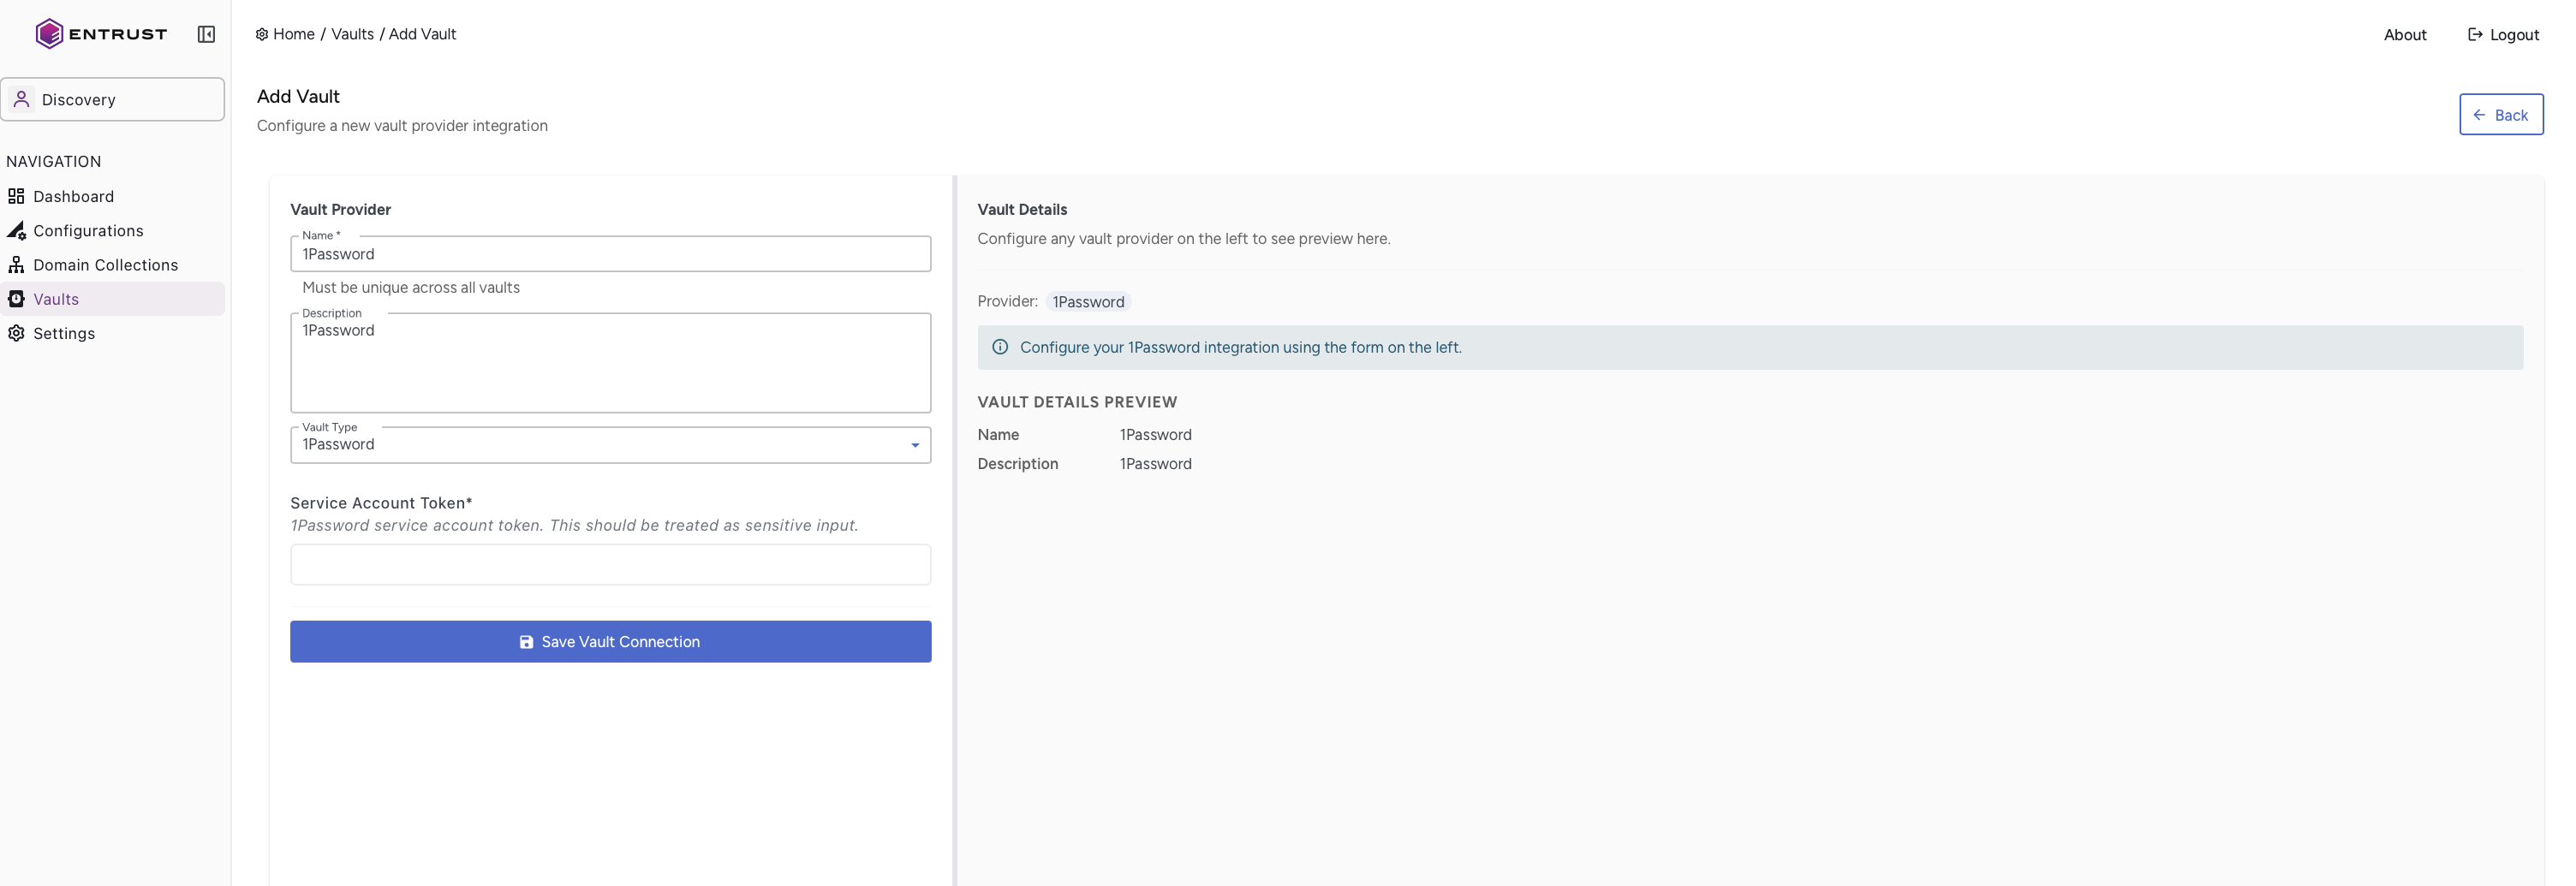
2. 1Password Vault type
a. Enter the Vault Name, provide a Description, select 1Password as the Vault Type,
b. Enter the Service Account Token details, and then click Save Vault Connection.
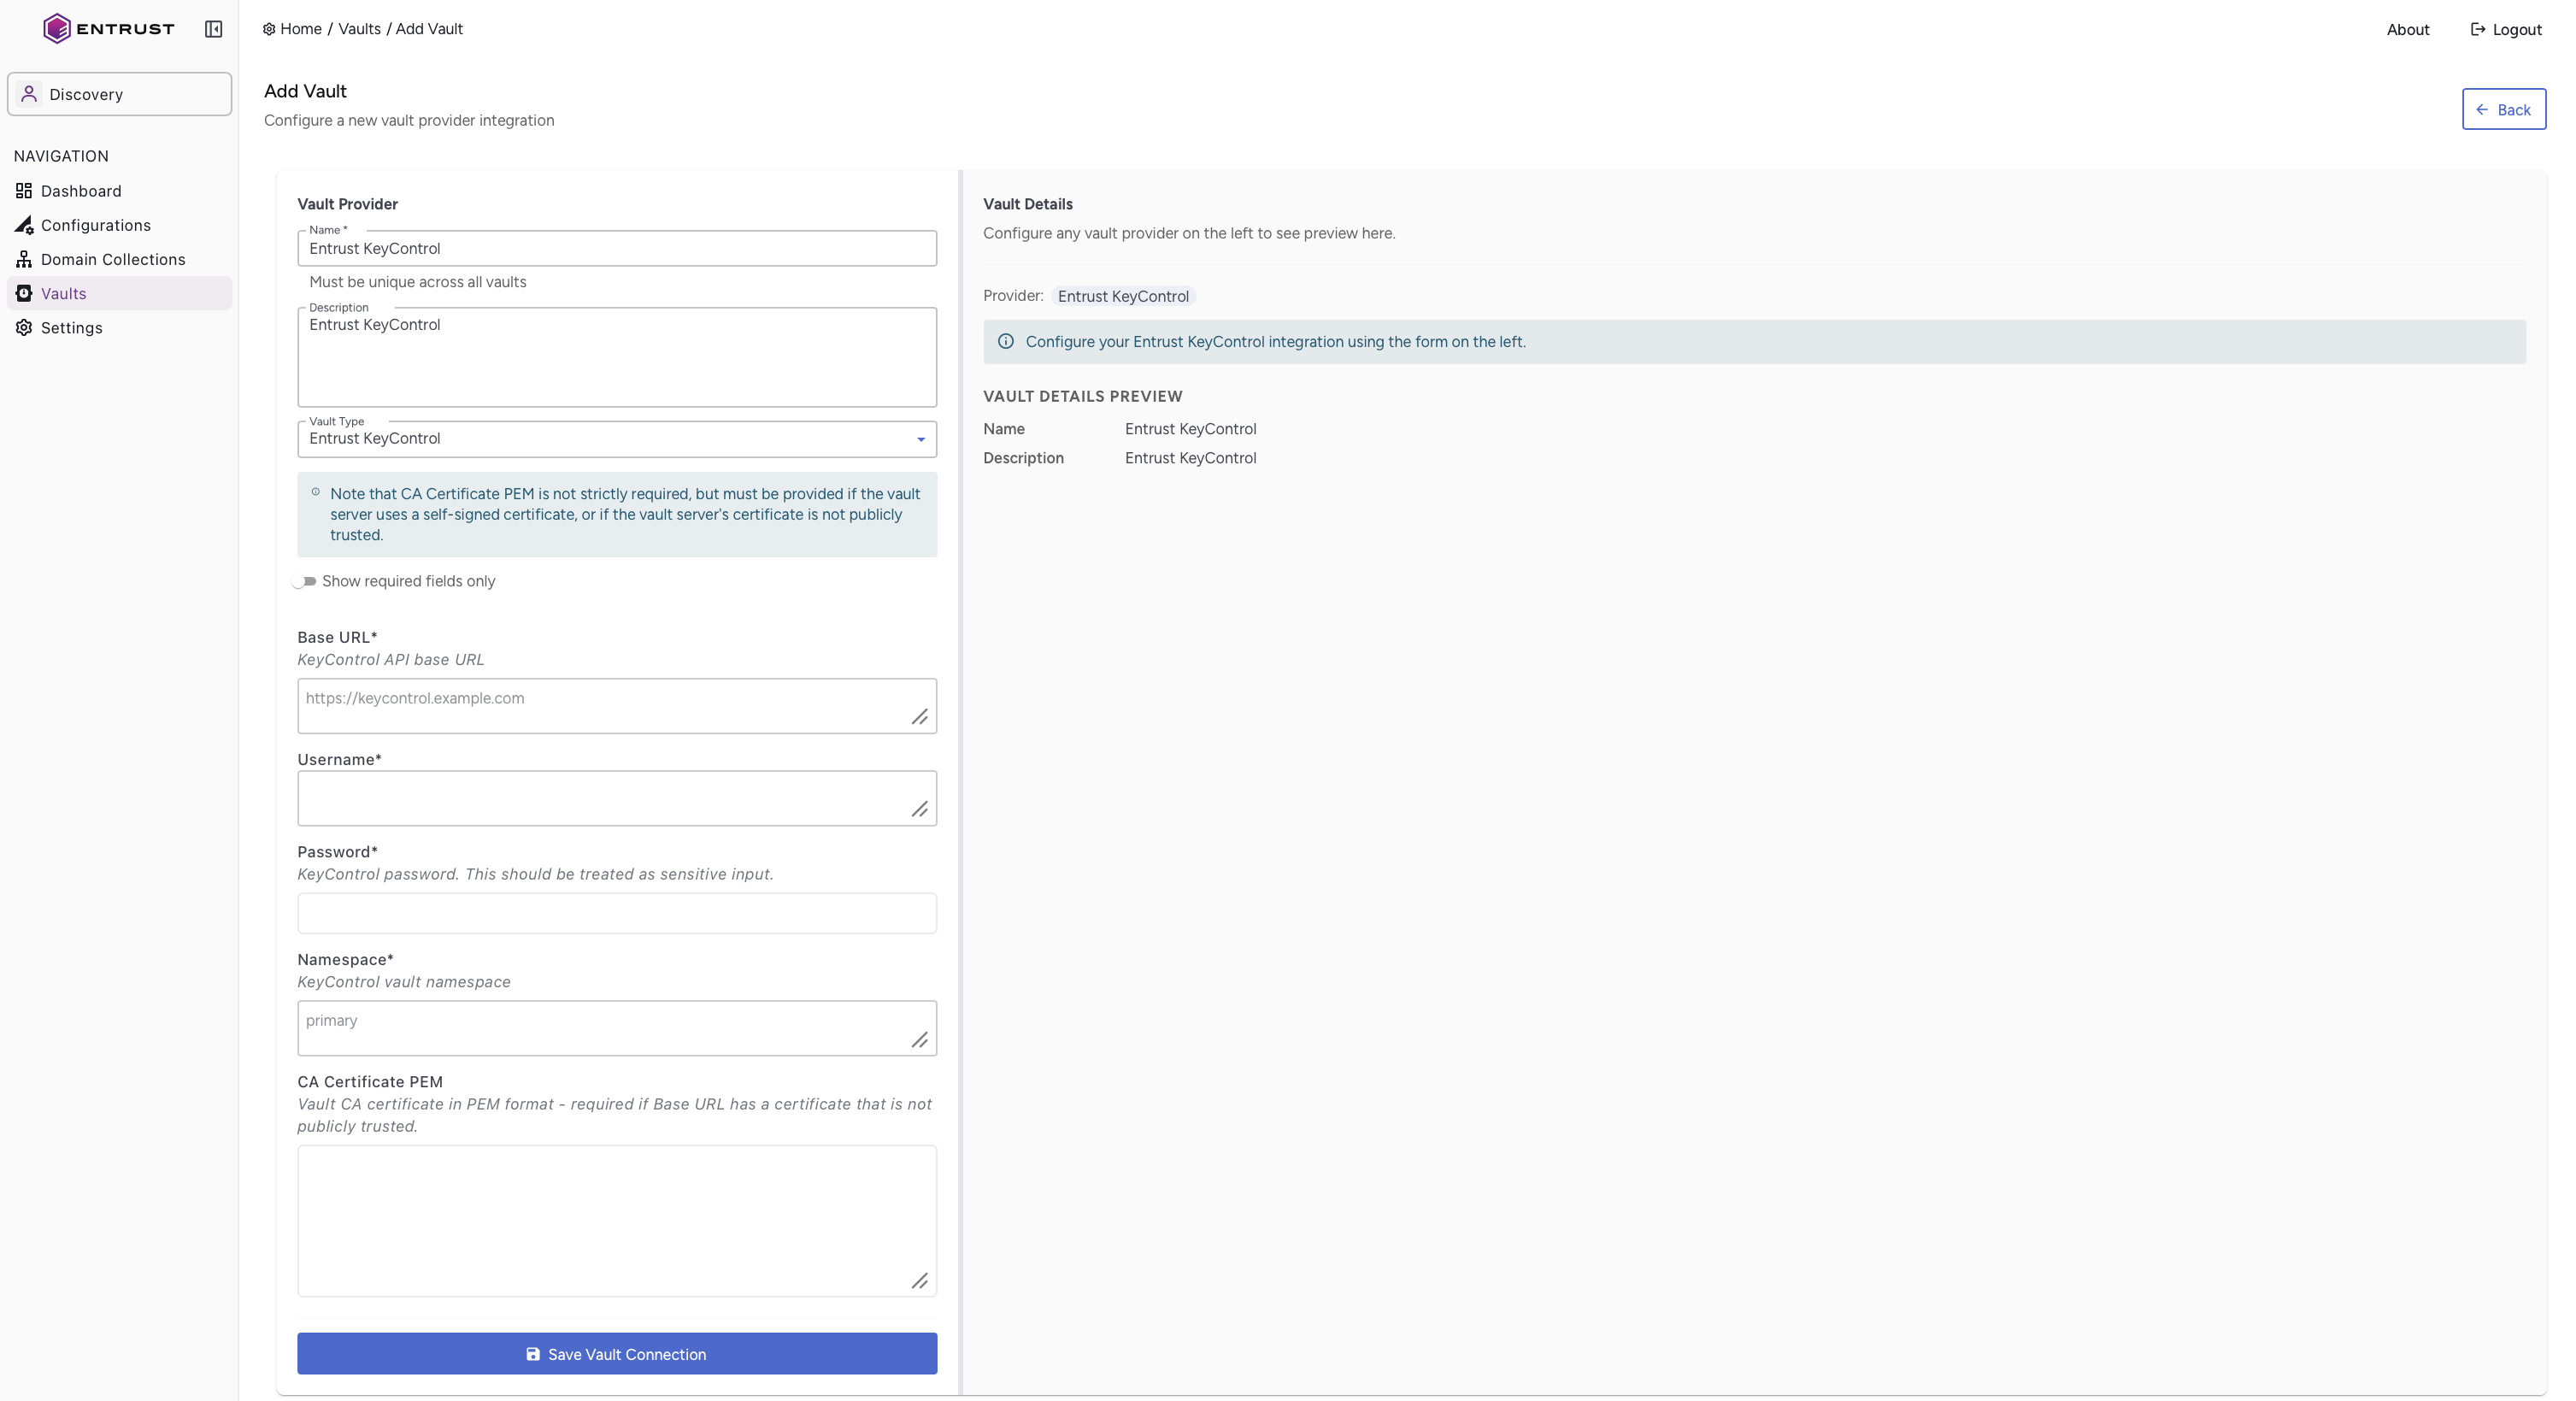
3. Entrust KeyControl Vault type.
a. Enter the Vault Name, provide a Description, select Entrust KeyControl as the Vault Type.
b. Enter the Base URL, Username, Password and Namespace details.
c. Enter the CA Certificate PEM details, and then click Save Vault Connection.
Note: The CA Certificate PEM is optional; however, it must be provided if the vault server uses a self-signed certificate
or if its certificate is not publicly trusted.
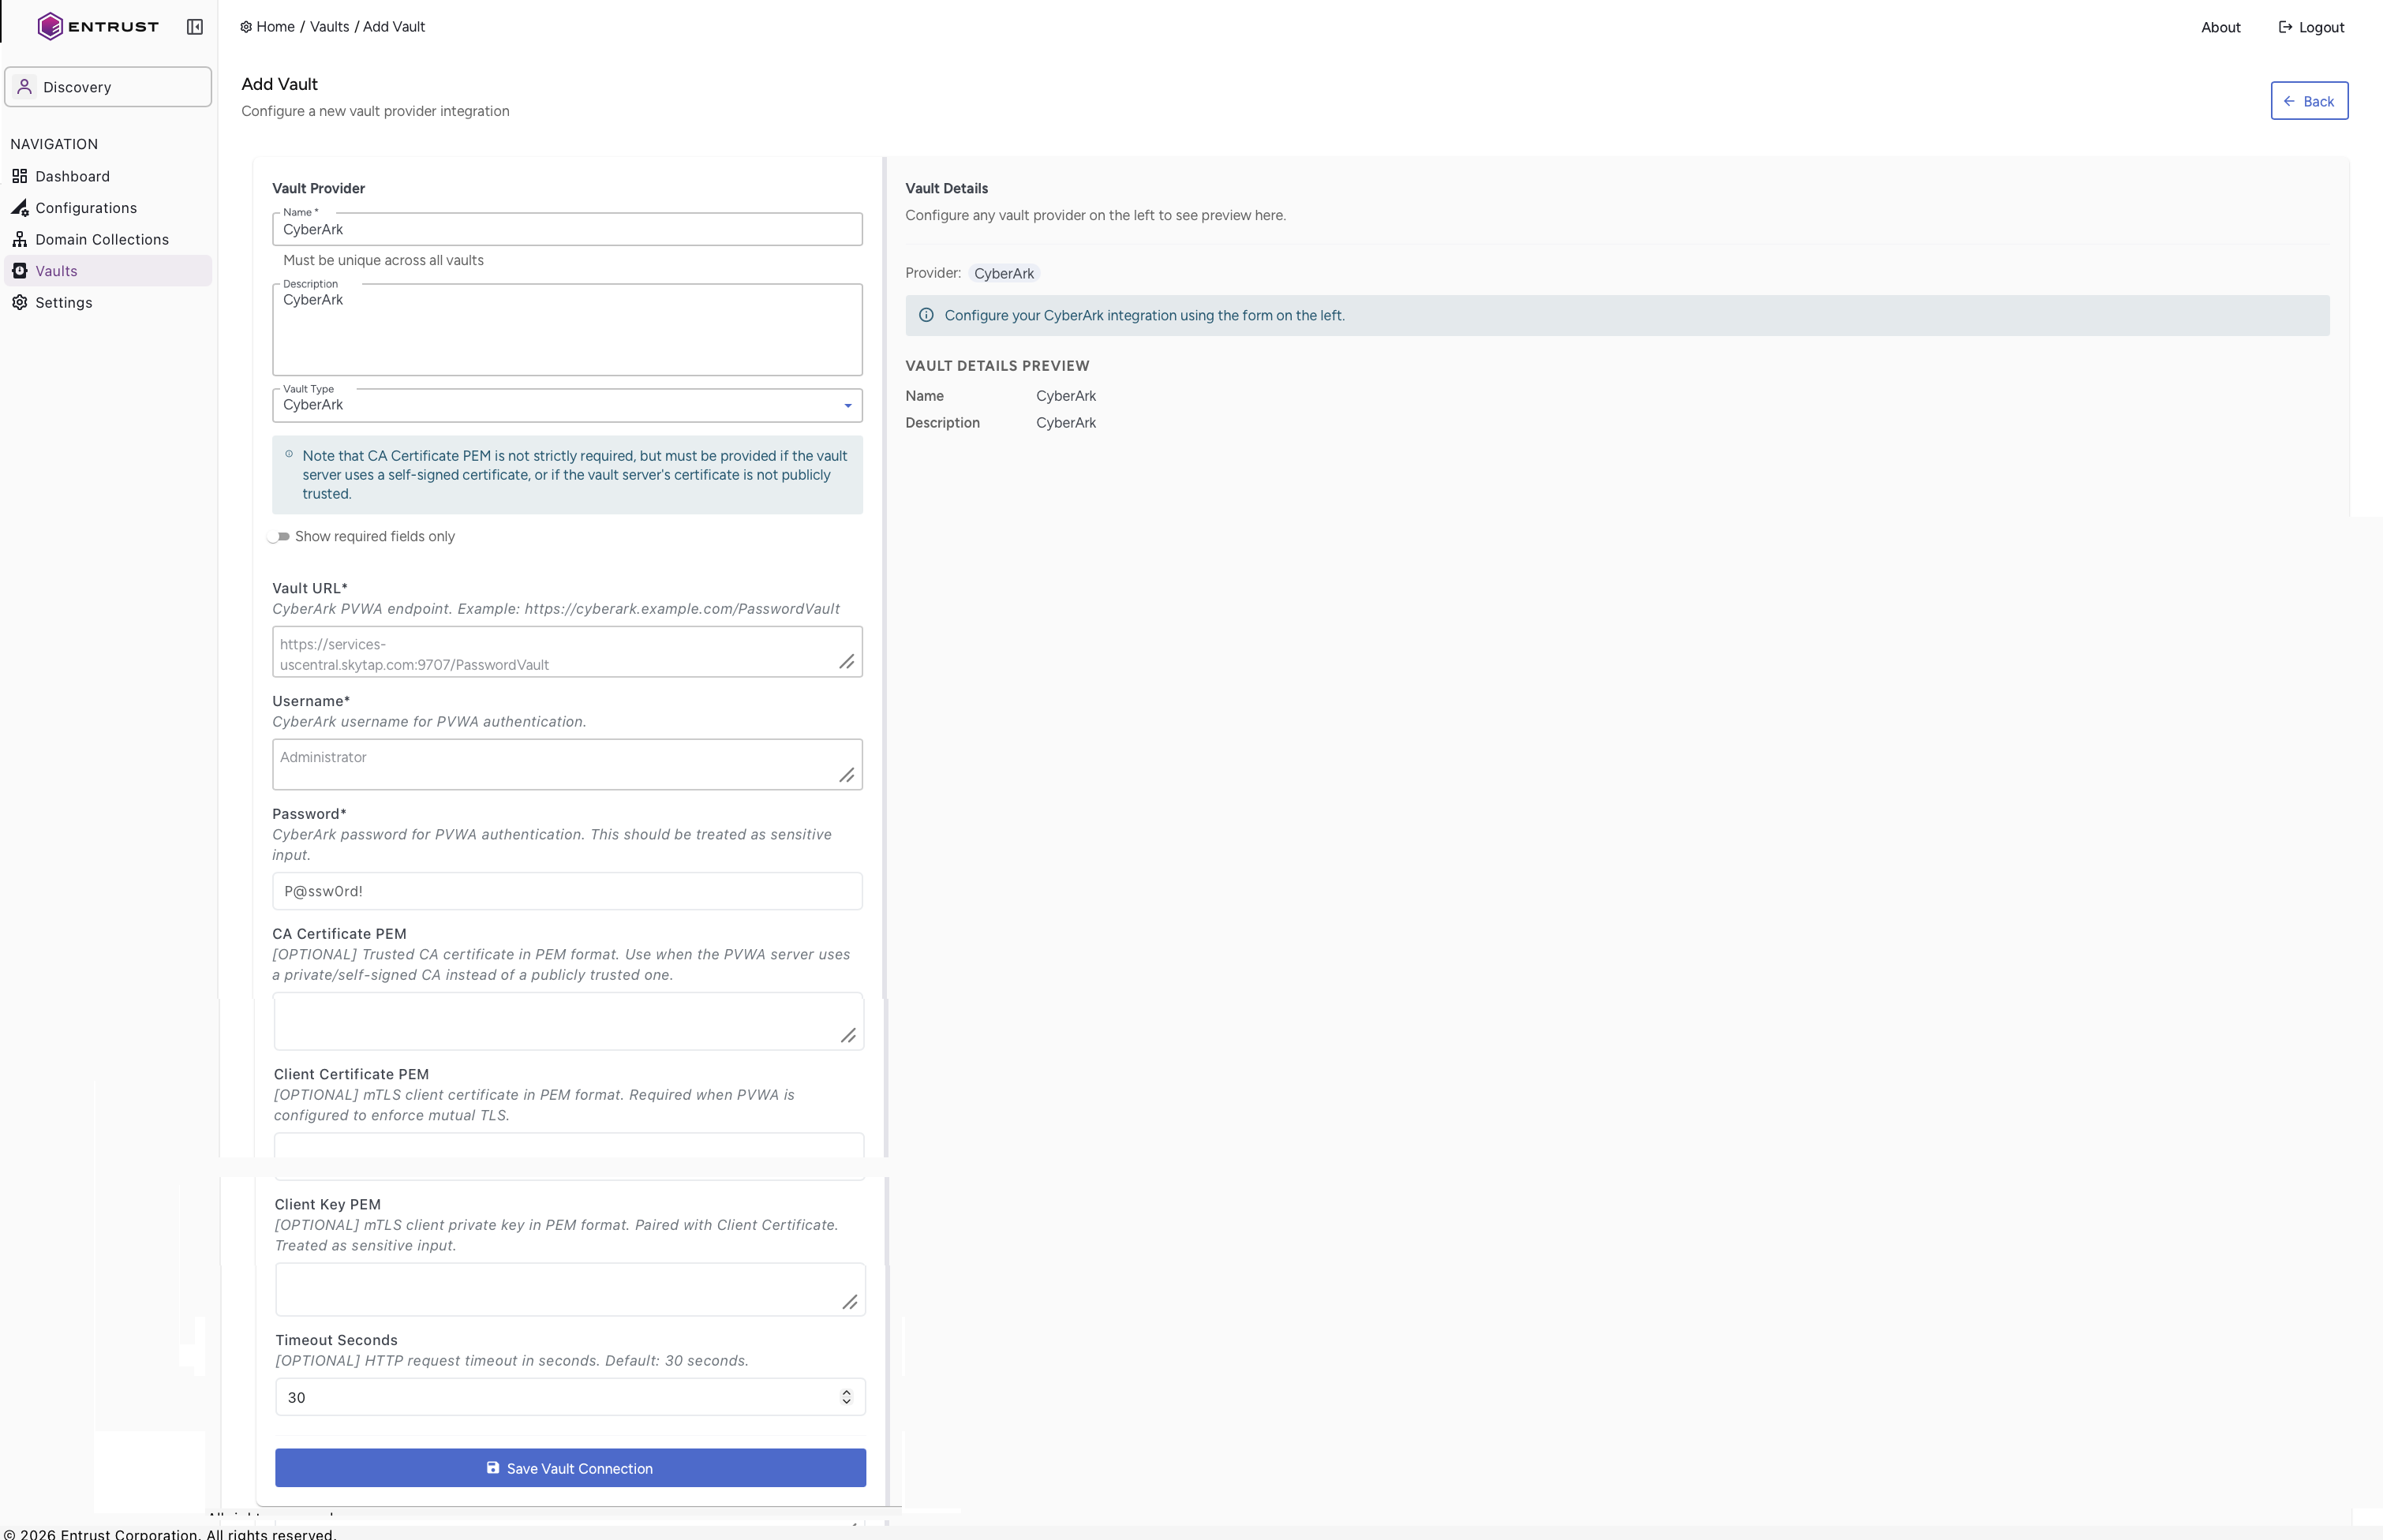
4. CyberArk Vault type.
a. Enter the Vault Name, provide a Description, select CyberArk as the Vault Type.
b. Enter the Vault URL, Username and Password.
c. Enter the CA Certificate PEM details.
d. Enter the Client Certificate PEM details.
e. Enter the Client Key PEM details, and then click Save Vault Connection.
Note: The CA Certificate PEM is optional, however, it must be provided if the vault server uses a self-signed certificate
or if its certificate is not publicly trusted.
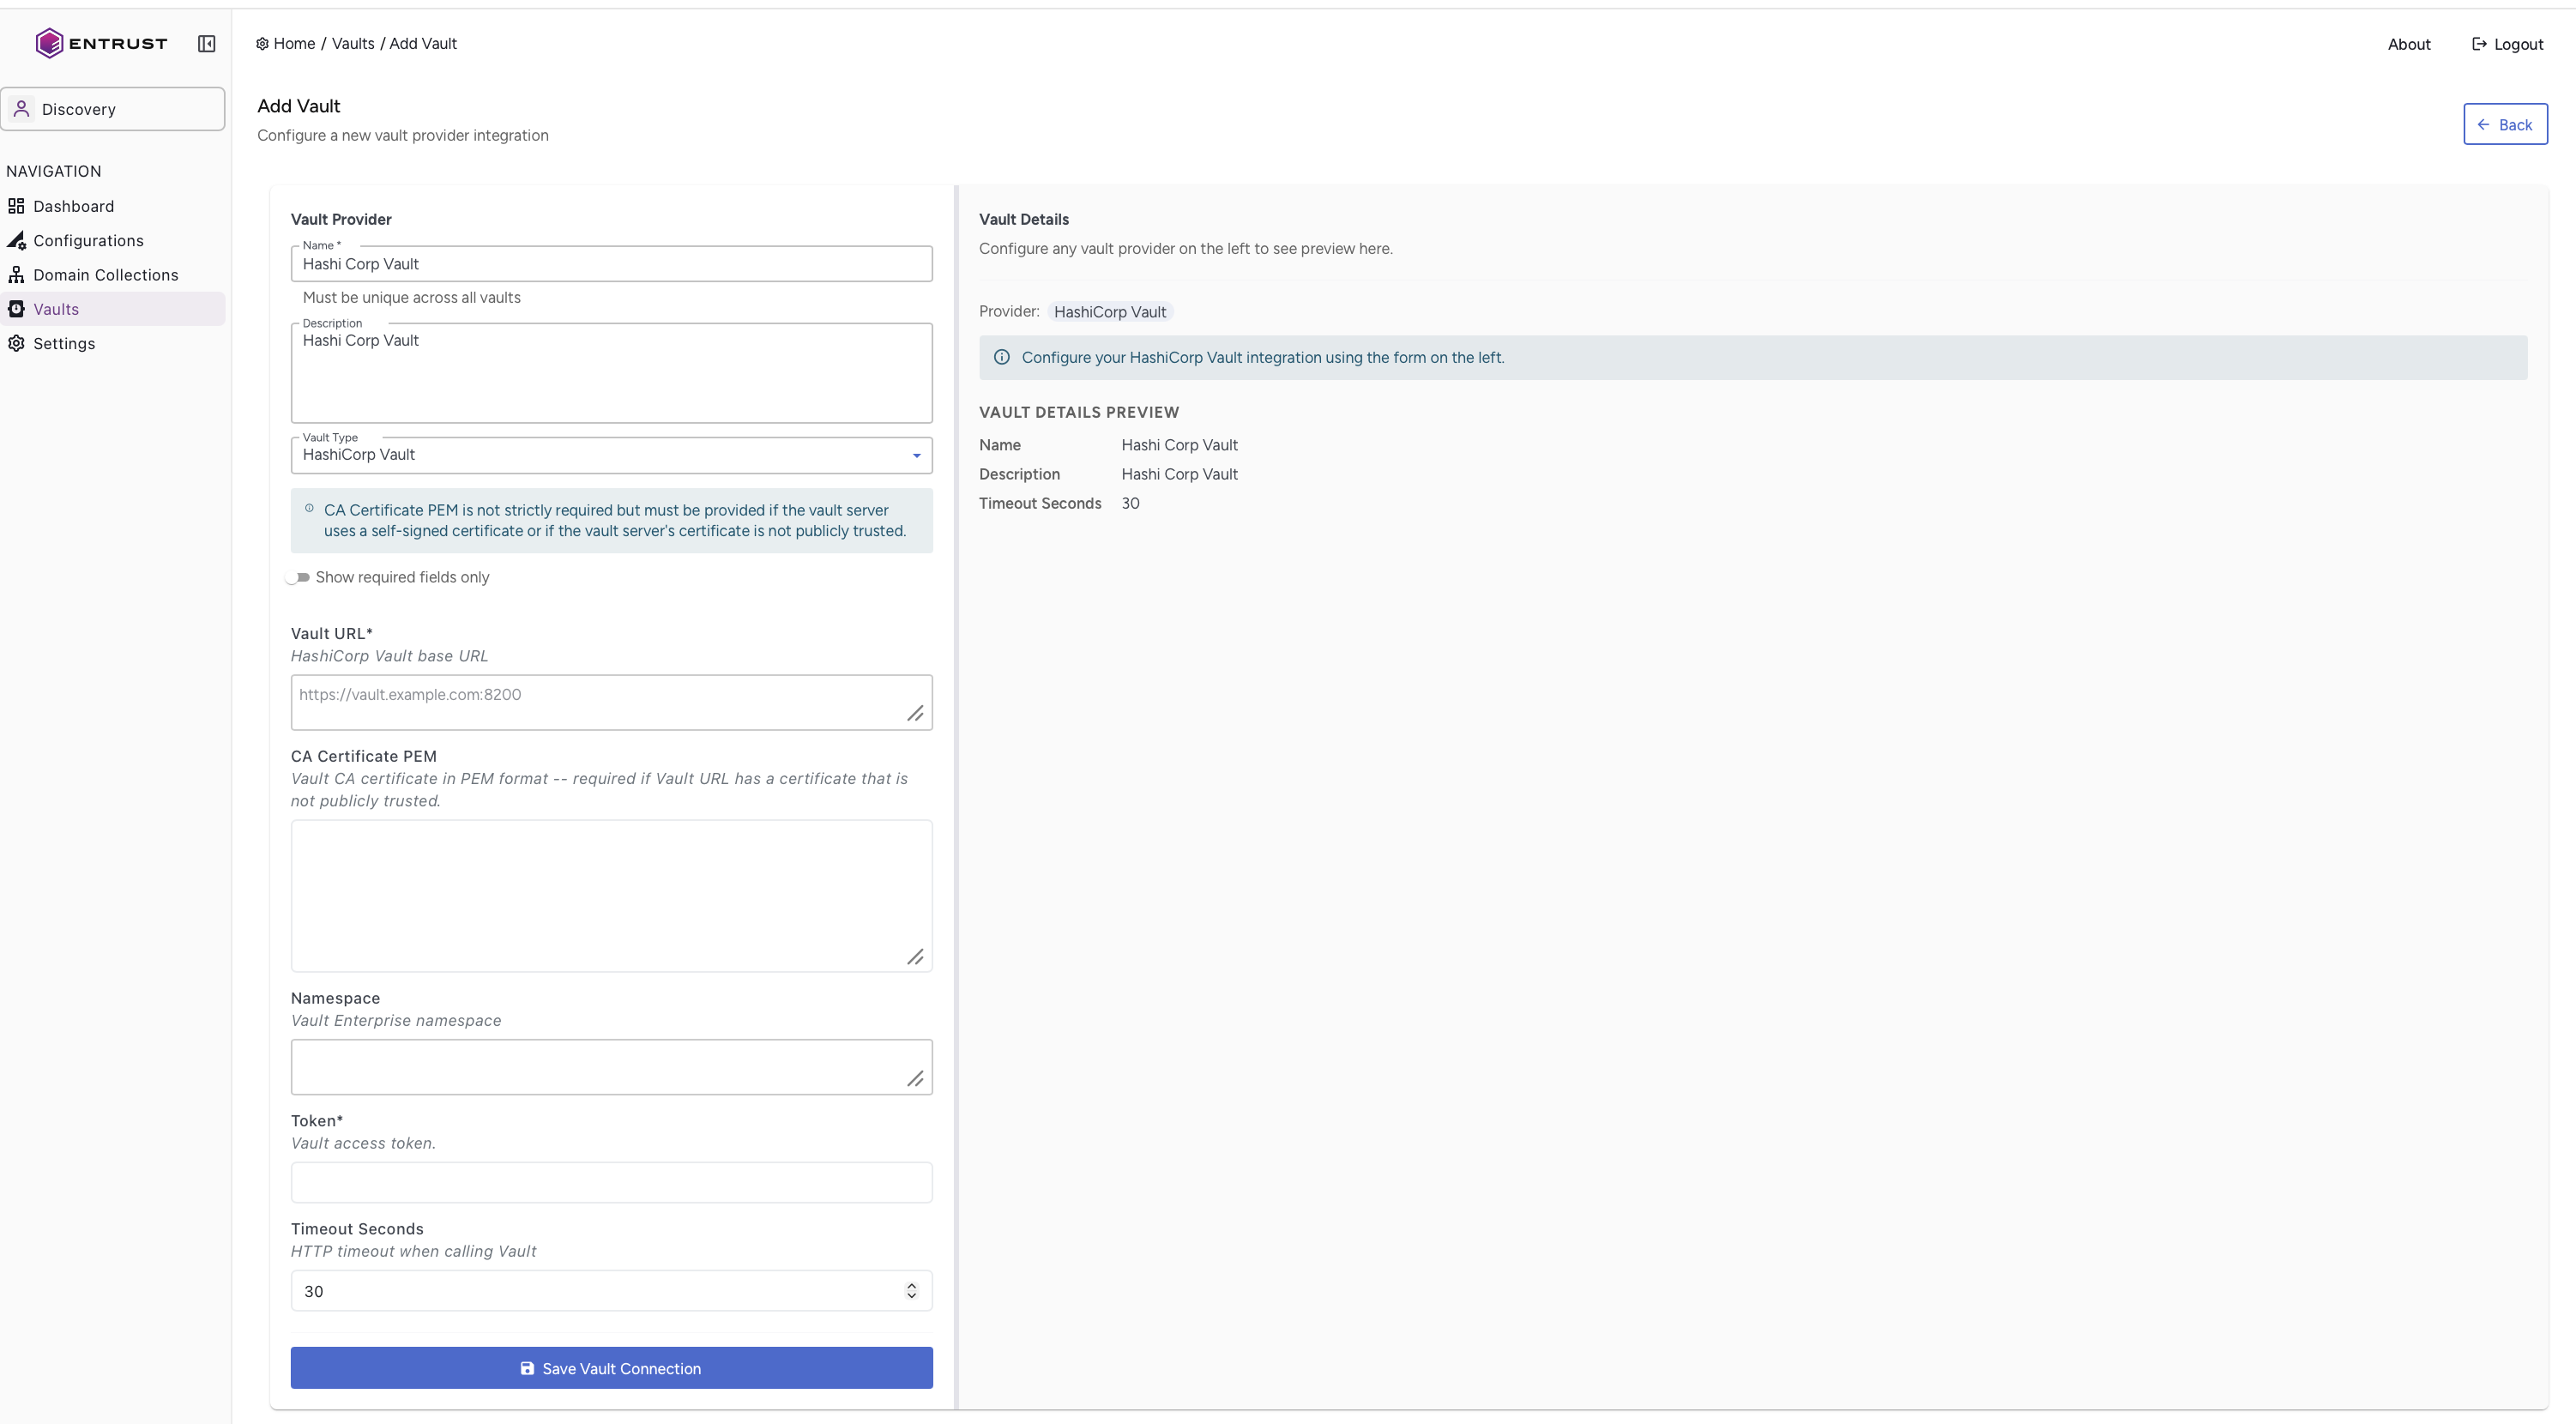
5. HashiCorp Vault type.
a. Enter the Vault Name, provide a Description, select CyberArk as the Vault Type.
b. Enter the Vault URL, Username and Password.
c. Enter the CA Certificate PEM and Token details and then click Save Vault Connection.
Note: The CA Certificate PEM is optional, however, it must be provided if the vault server uses a self-signed certificate
or if its certificate is not publicly trusted.
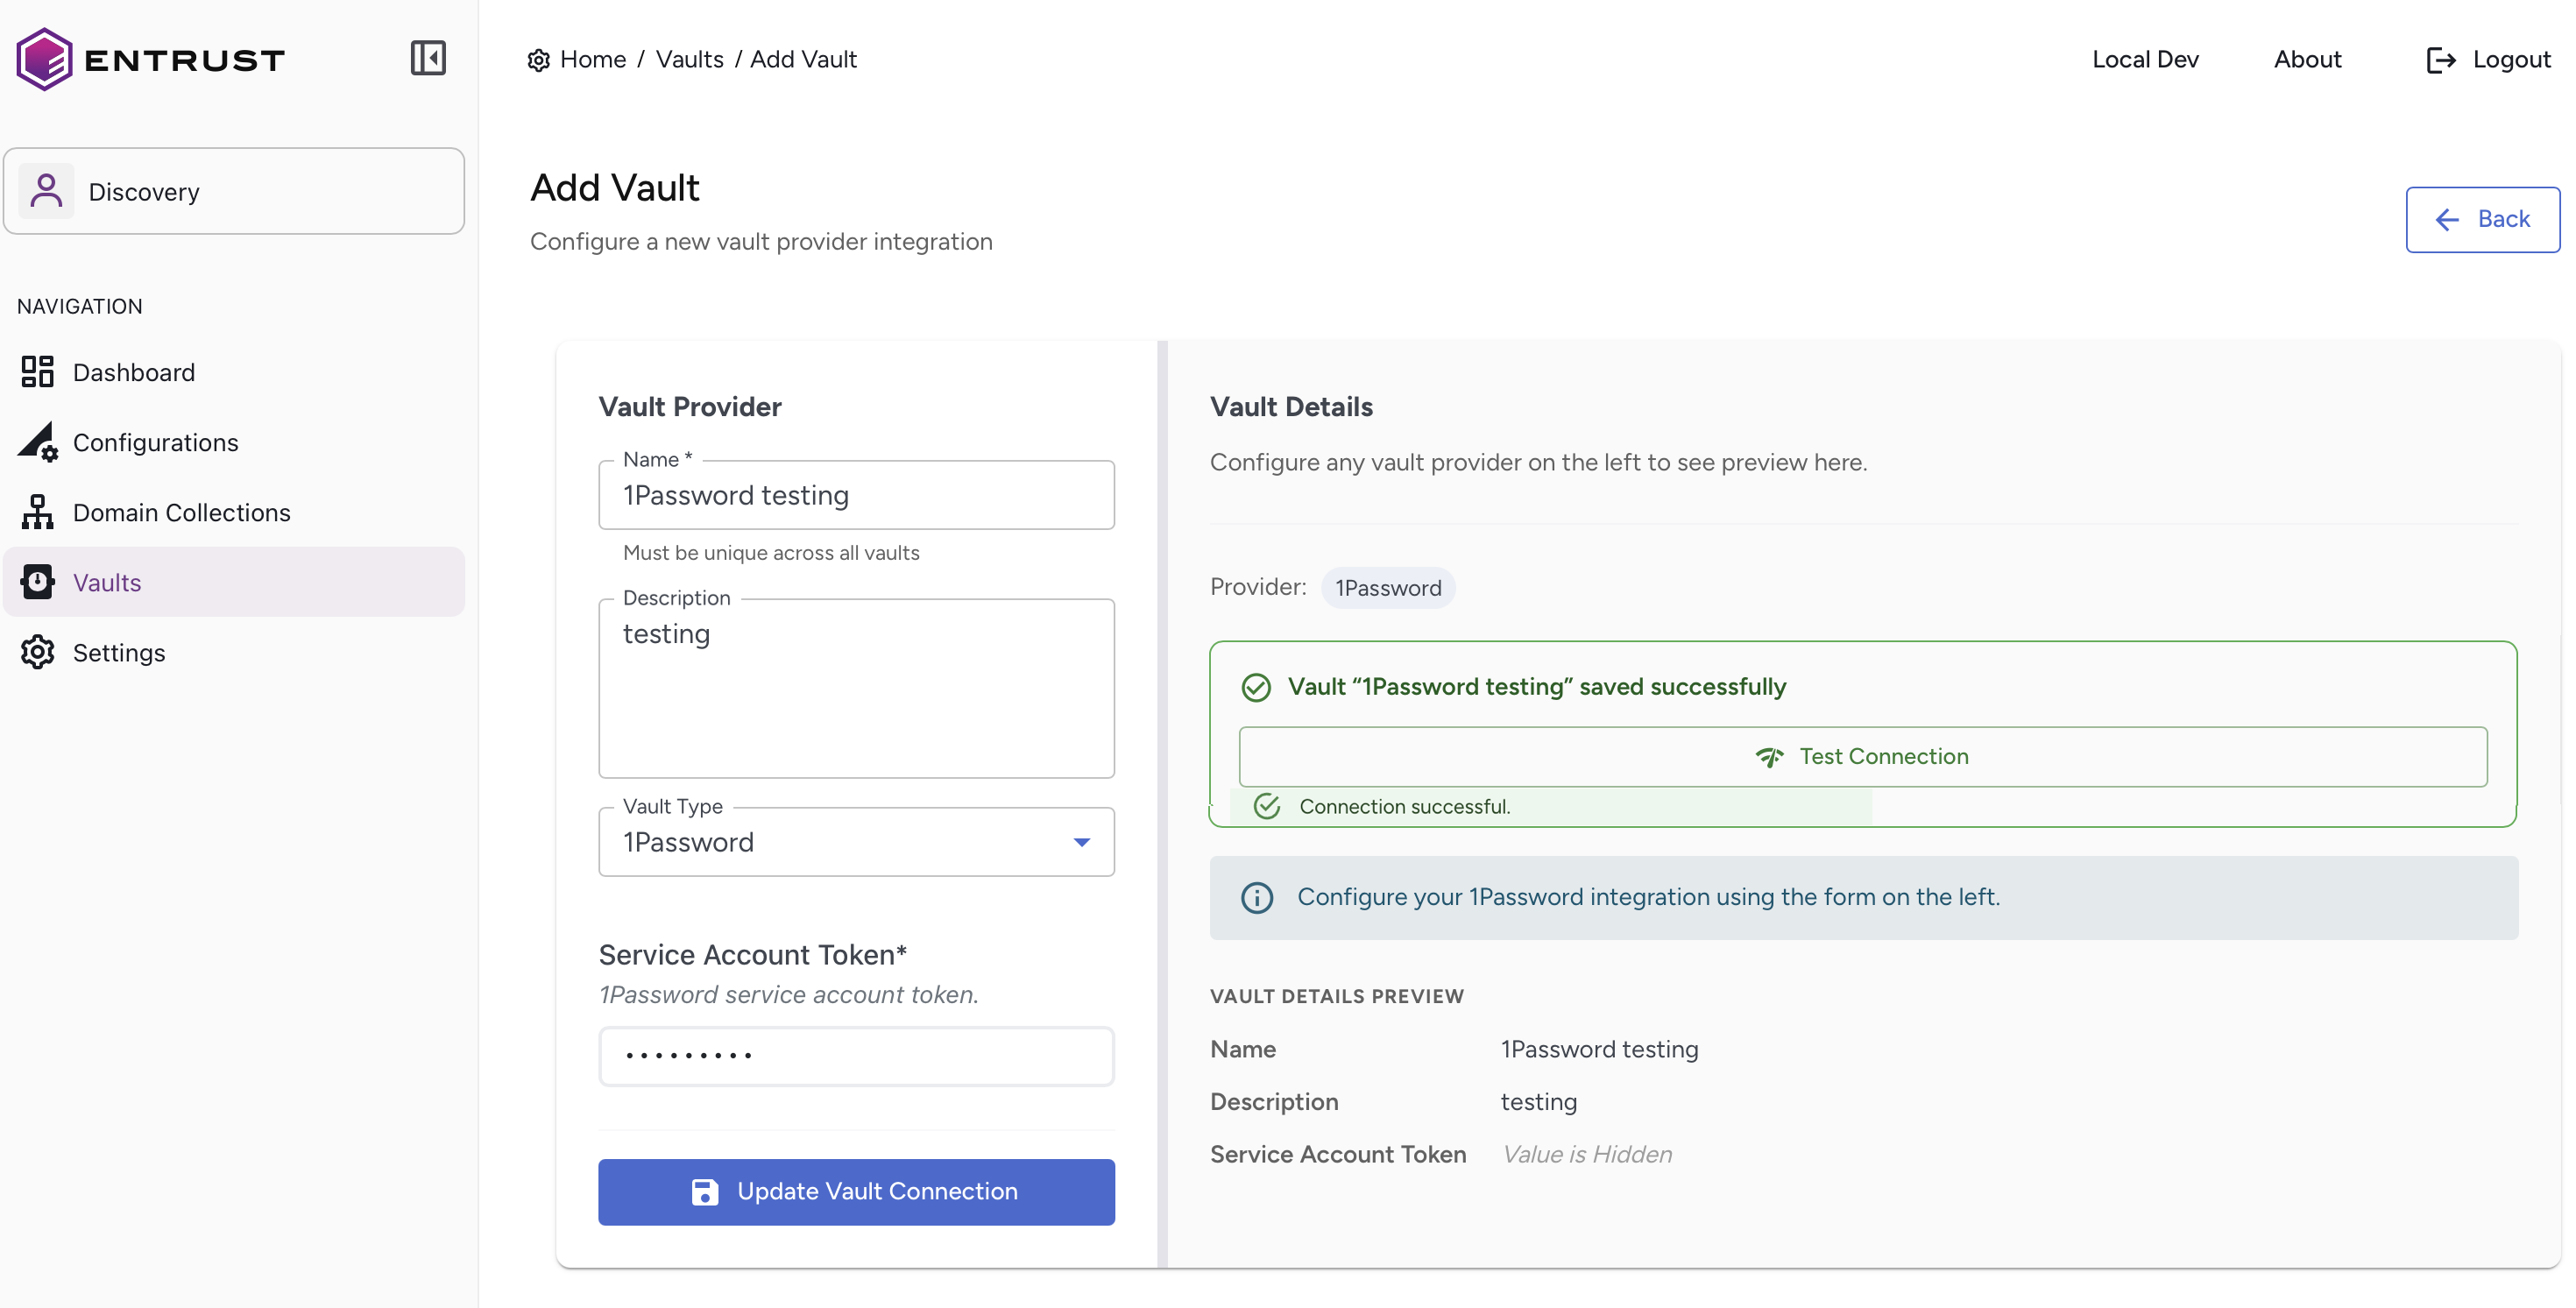
Verify the Vault Connection
Note: The system displays the message Vault "1password testing" saved successfully.
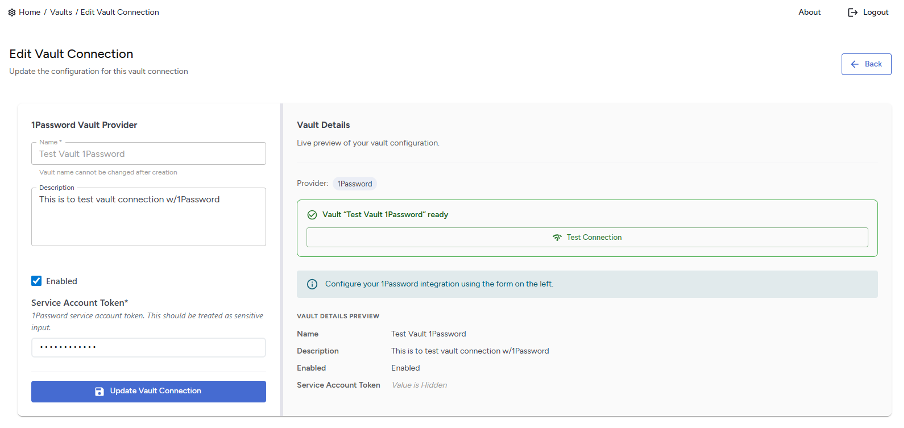
6. Click Test Connection to verify the vault configuration.
Note: The system displays the message Connection successful when the connection is established successfully.
Note: If the vault credentials or configuration are invalid or unreachable, a Connection failed alert is displayed in red.
Using Configured Vault Values
7. Once the Vaults are configured, navigate to the Configurations page and click Add configuration drop-down to add a configuration or edit an existing configuration.
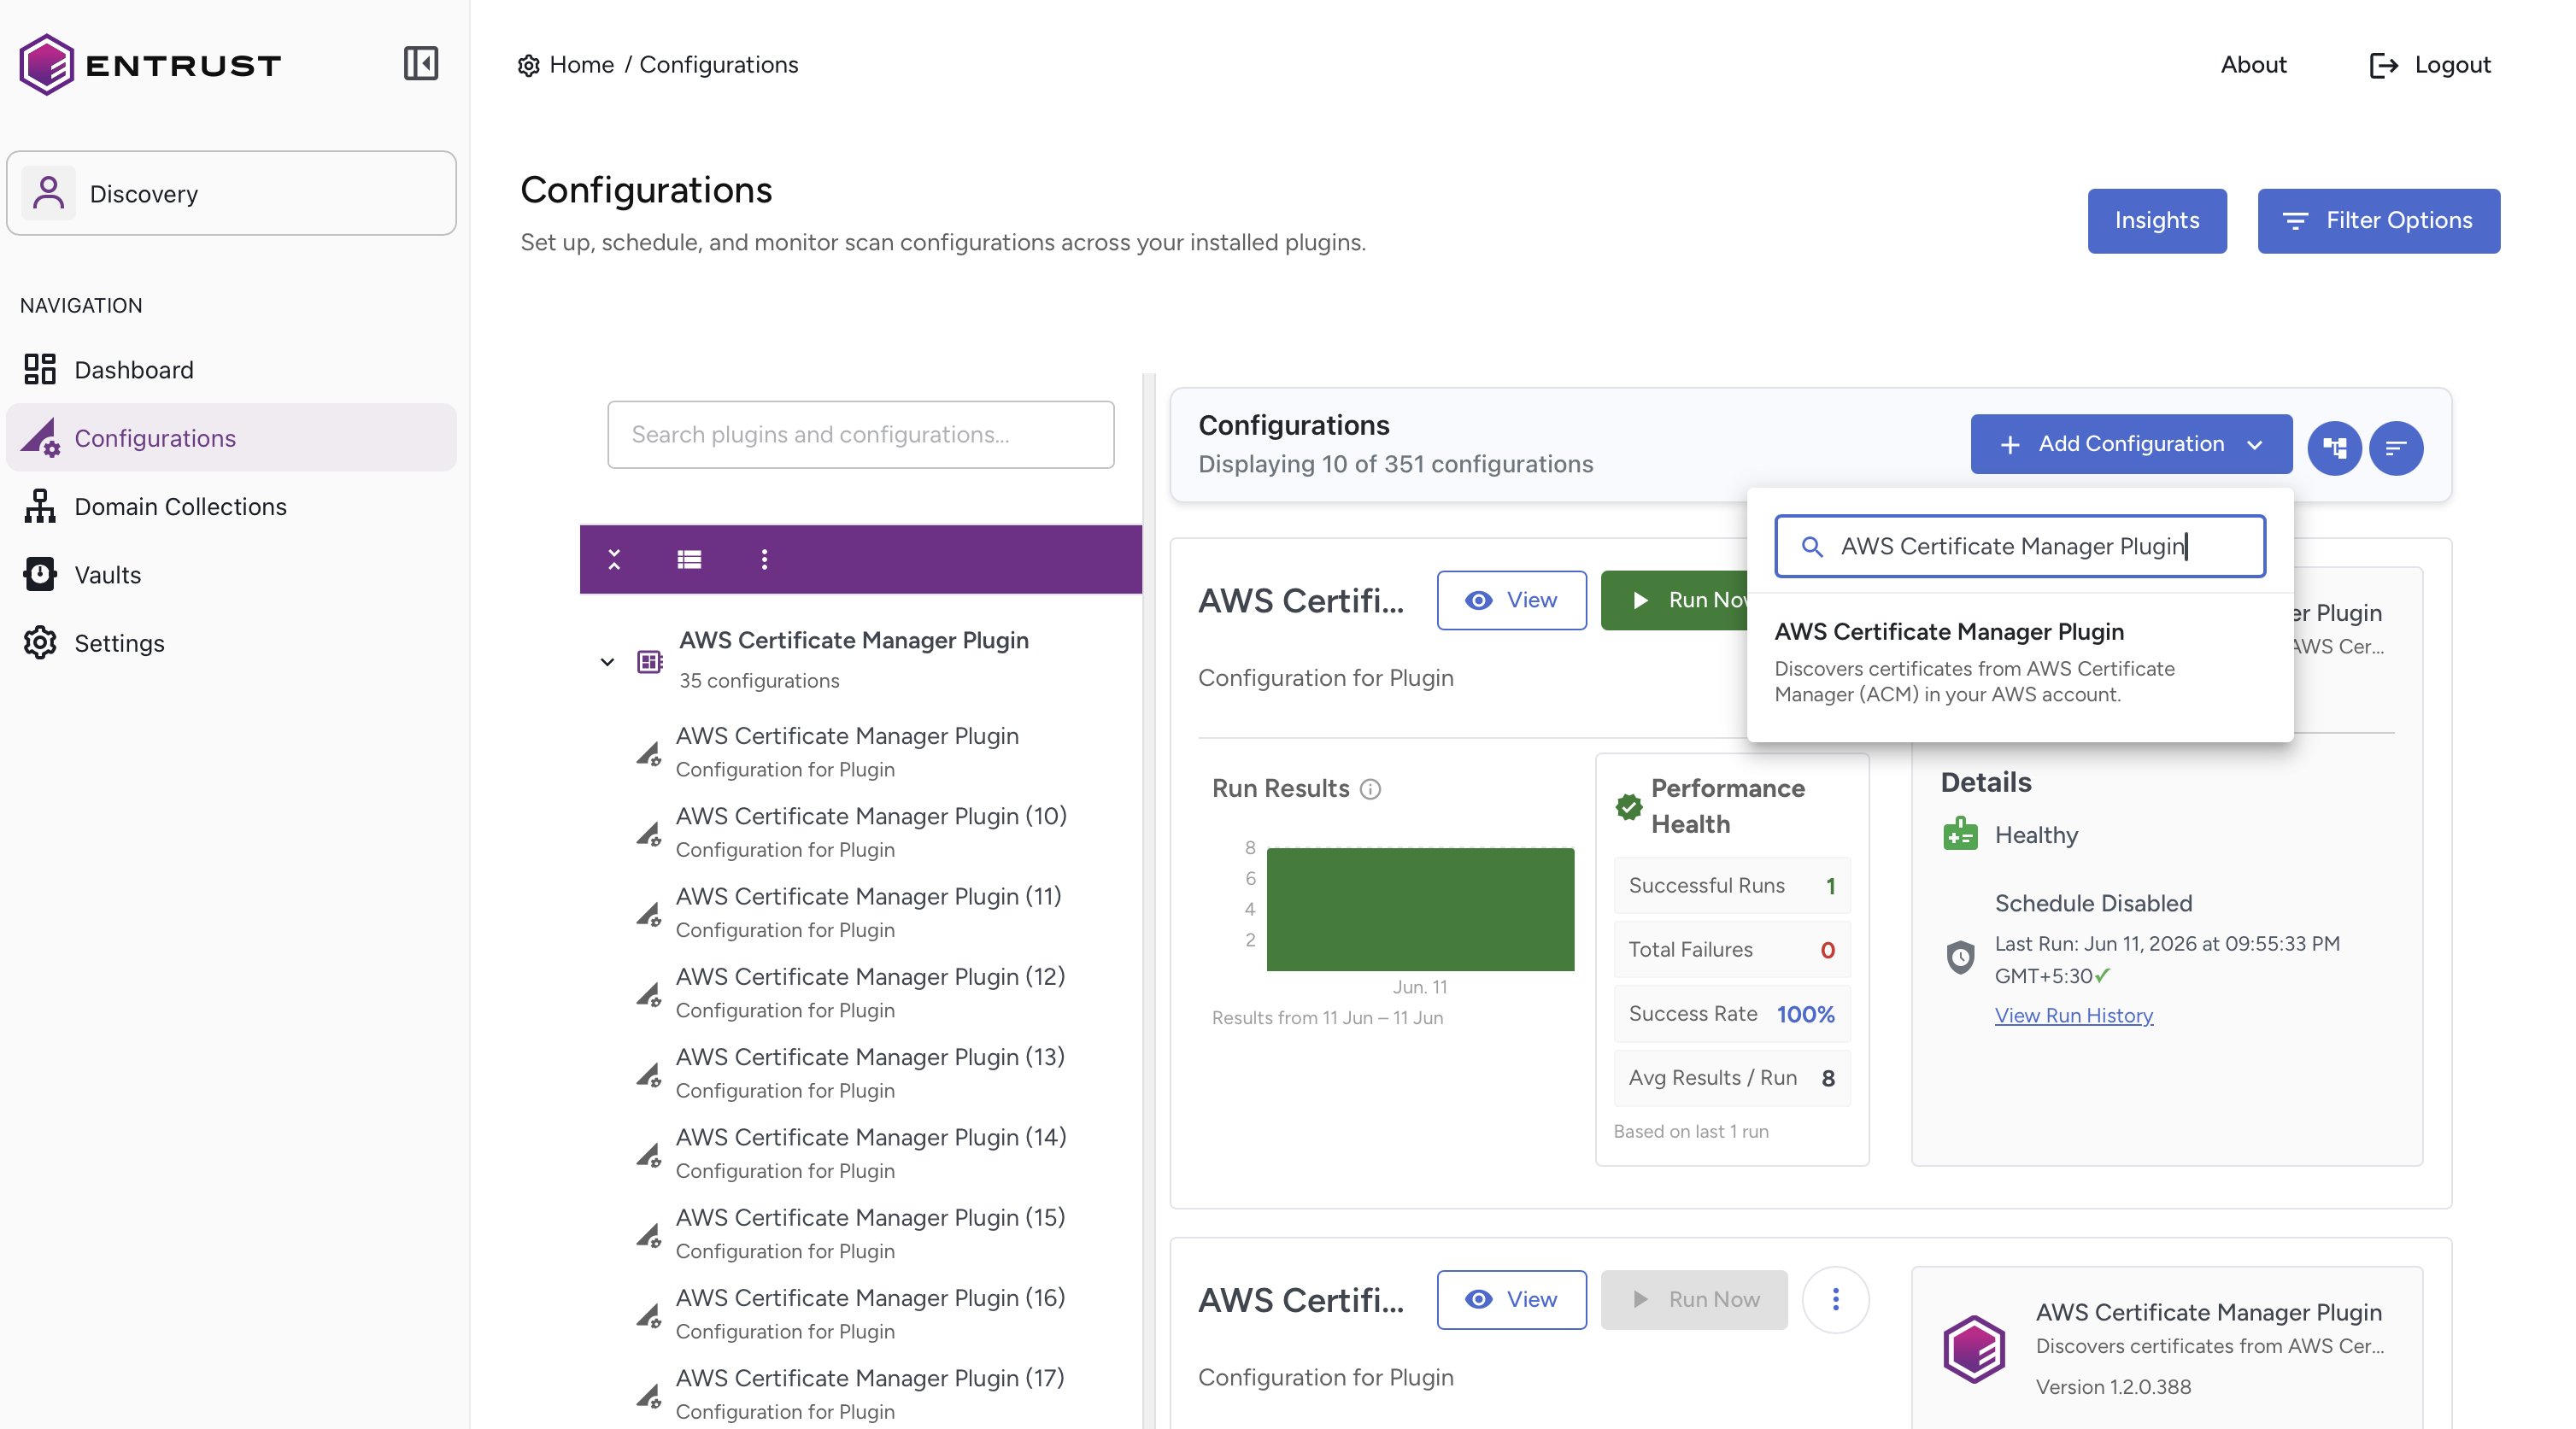
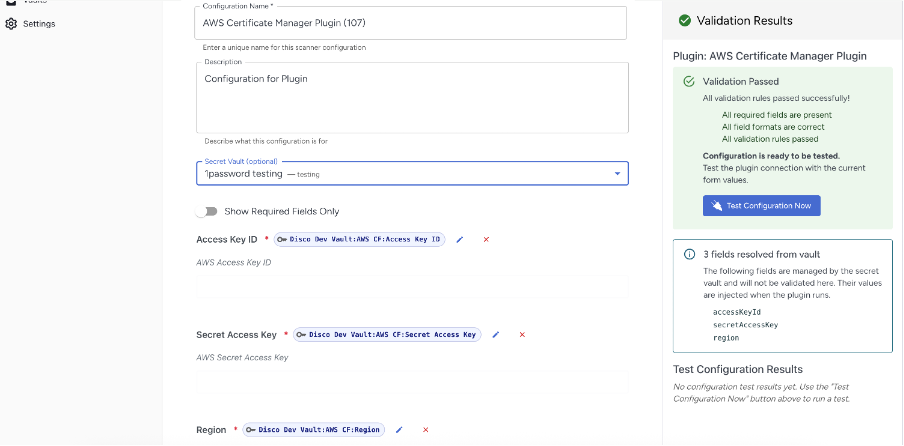
8. To select a configured Secret Vault (optional) connection, click Assign from vault link drop-down.
9. To select the appropriate value for the field, click Assign from vault link drop-down.
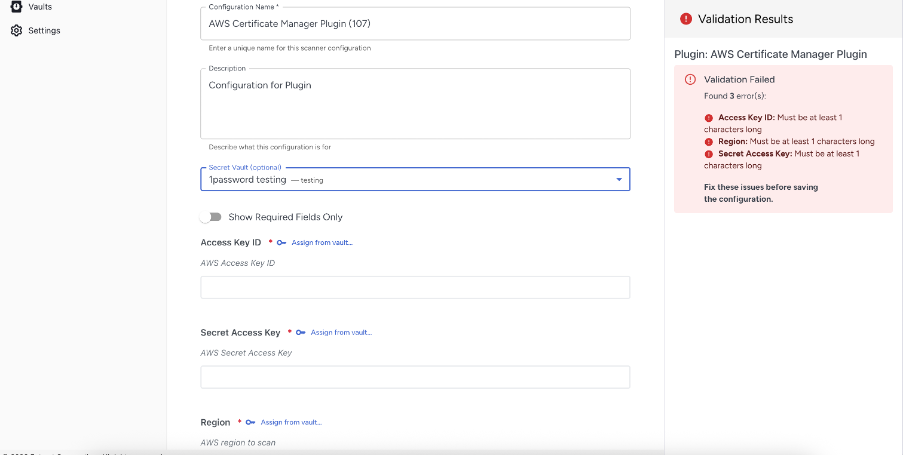
Note: Validation results display the fields populated from the selected vault.
Edit or Delete a Vault Connection
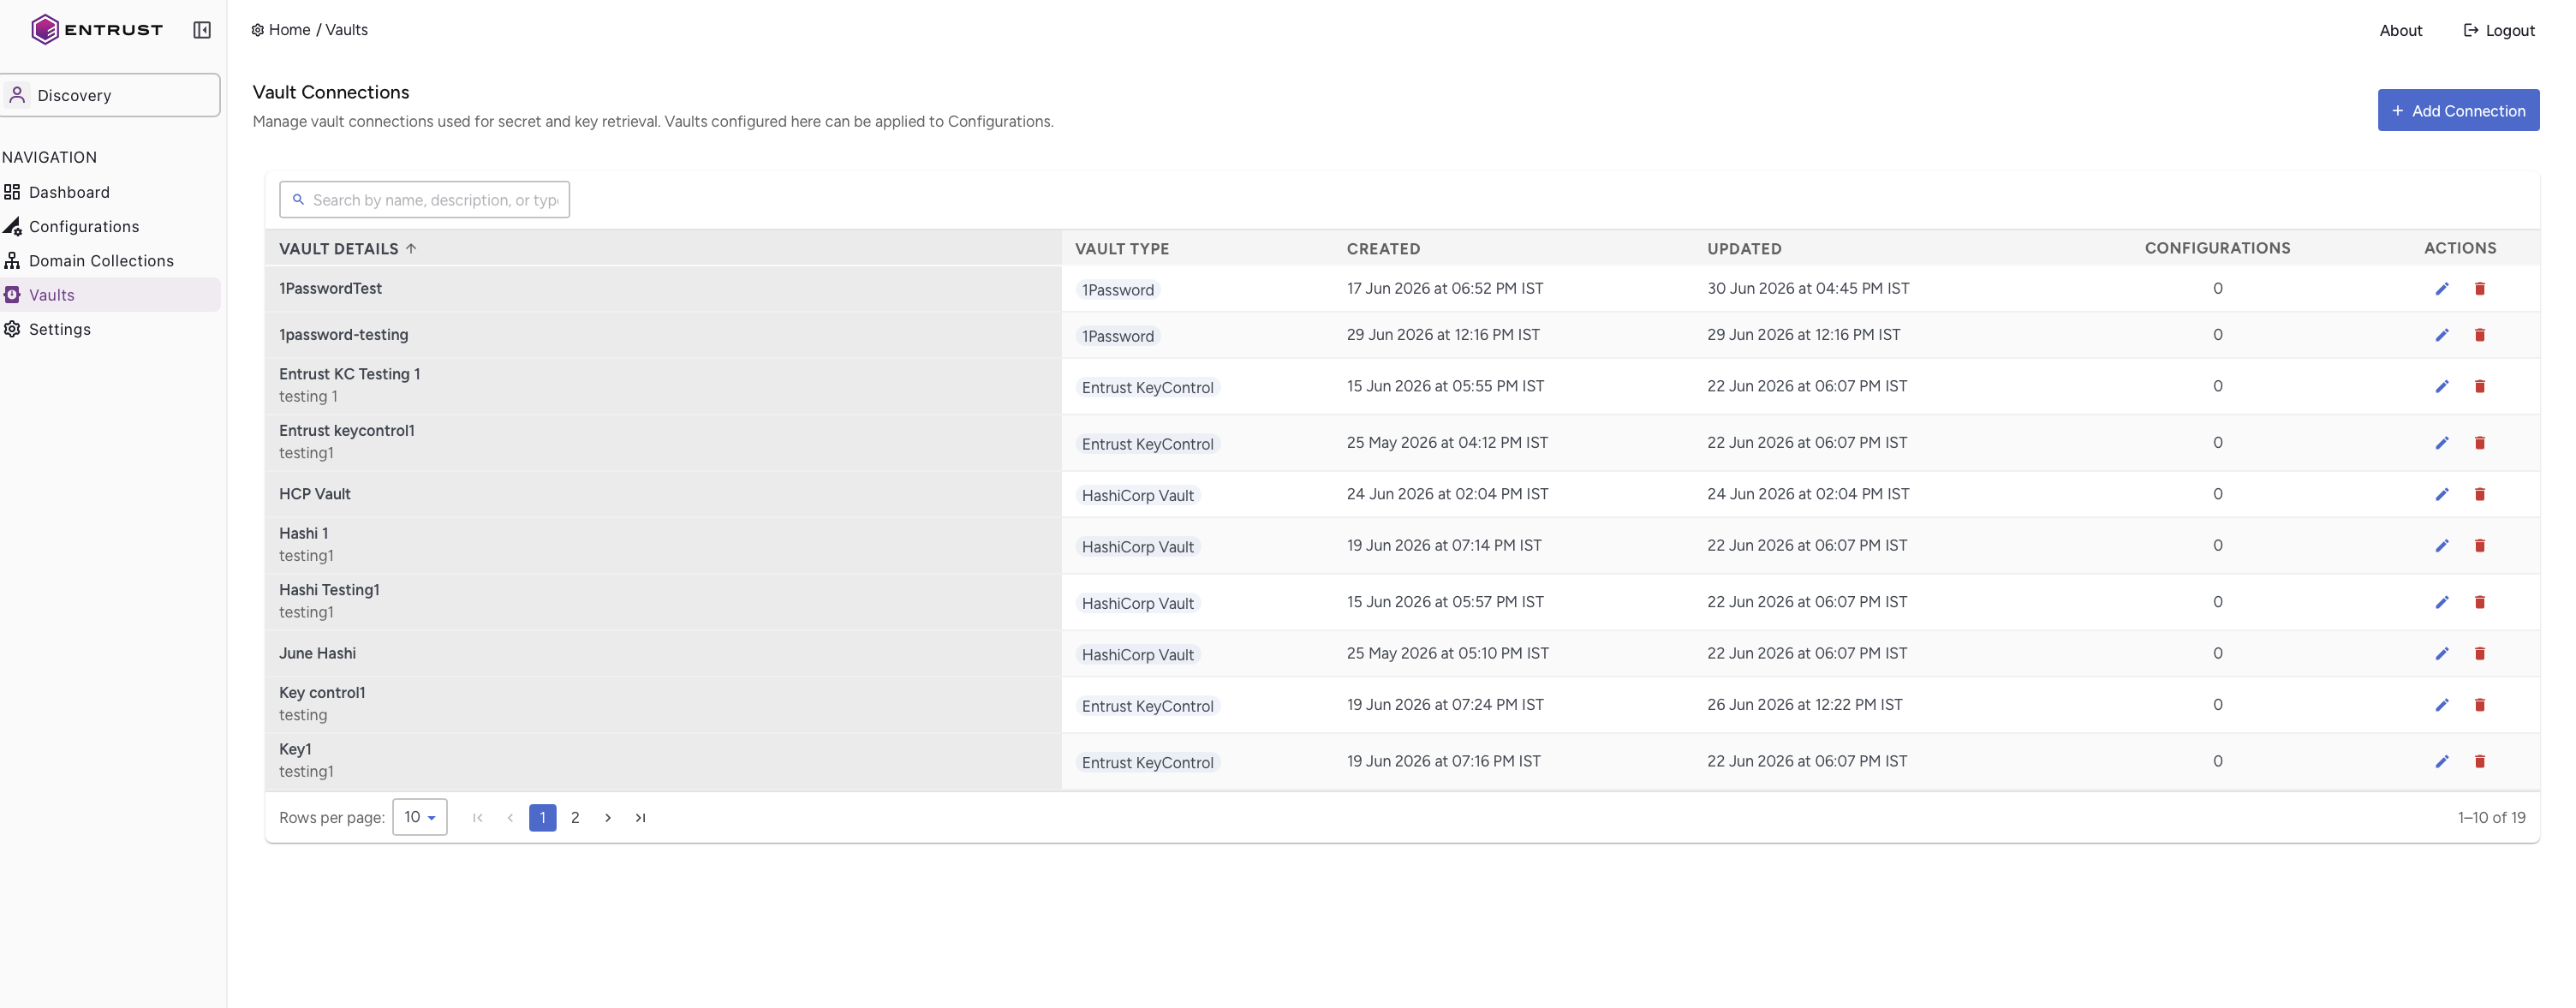
10. Navigate to the Vault Connections page, click Edit icon corresponding to the required vault connection to modify its configuration.
Note: This page allows users to view vault connection details such as creation date, last updated date, and configuration count.
Note: When a user deletes a vault connection using the Delete icon, all configurations associated with that vault connection are also deleted.
11. Edit the required fields as Vault Name, Description and Status then click Update Vault Connection.
Note: After clicking Update Vault Connection, retest the connection to verify that the vault configurationis functioning correctly.